
Jobflows is a powerful HR recruiting app that integrates directly with monday.com, letting your team manage open positions, track applicants, and publish a branded careers page — all without leaving your workspace. This guide walks you through the complete Jobflows setup process in six straightforward steps, from installation to posting your first job listing.
Whether you’re a monday.com veteran or just getting started, you’ll have Jobflows fully configured in under 30 minutes.
What is Jobflows for monday.com?
Jobflows is a monday.com app designed to streamline end-to-end recruitment workflows. It connects your open positions board, your applicant pipeline, and a public-facing careers page into a single, automated system. When a candidate applies through your careers page, their data flows automatically into your monday.com boards — eliminating manual data entry and keeping your hiring team aligned.
Installation tutorial
Before You Begin
- An active monday.com account (Free, Pro, or higher)
- Admin or member permissions to install apps in your workspace
- No prior Jobflows experience needed
Don’t have a monday.com account yet? Start here to create one before proceeding.
Step by step set up Jobflows on monday.com
Step 1: Install the Jobflows App in your monday.com account
The first step is adding the Jobflows app to your monday.com account.
Click here to install Jobflows
This link takes you to the monday.com OAuth authorization screen. Review the requested permissions and click Install to add Jobflows to your account.
Prefer to watch first? Here’s the full installation walkthrough:
Step 2: Install the Jobflows Workspace Template
Once the app is installed, you’ll need to set up the Jobflows workspace in monday.com using the built-in template.
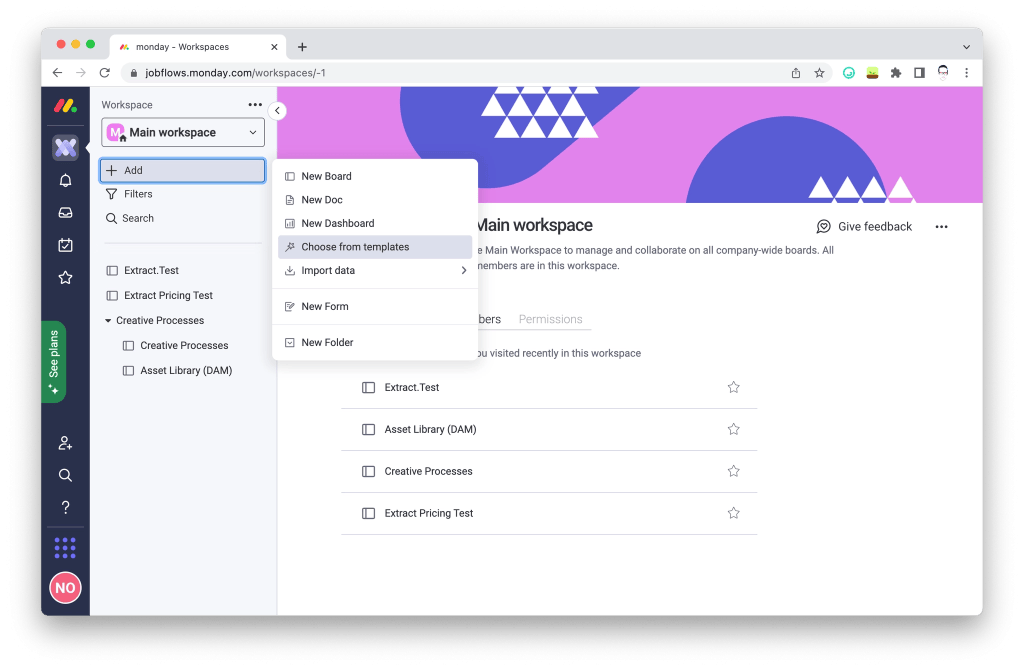
- From the left sidebar, click Add (the “+” icon)
- Select Choose from templates
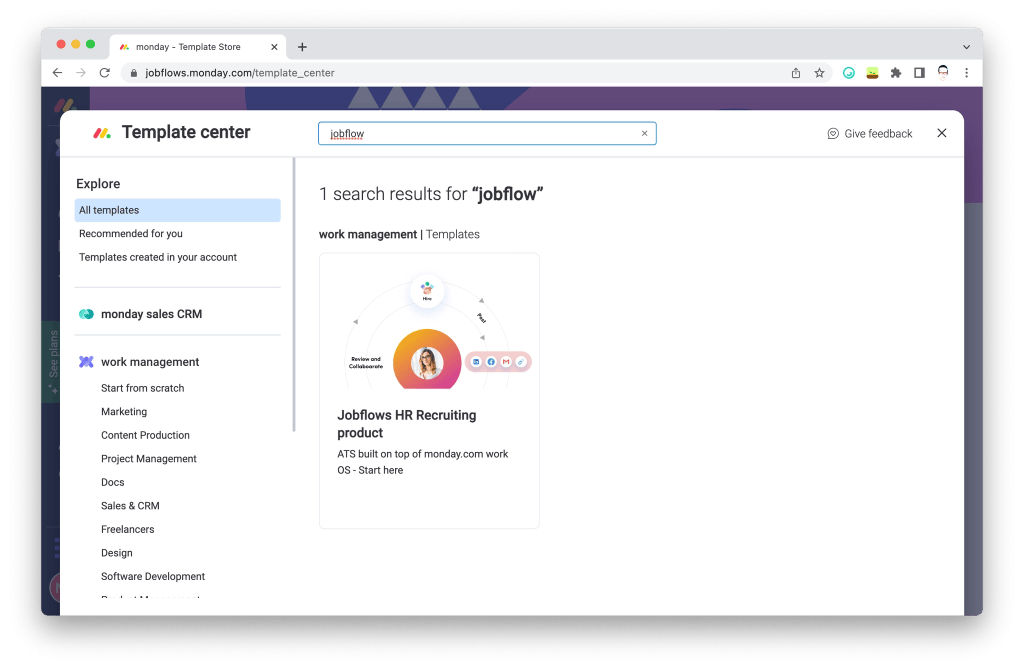
- In the Template Center search bar, type “Jobflows”
- Select the “Jobflows HR Recruiting” template from the results
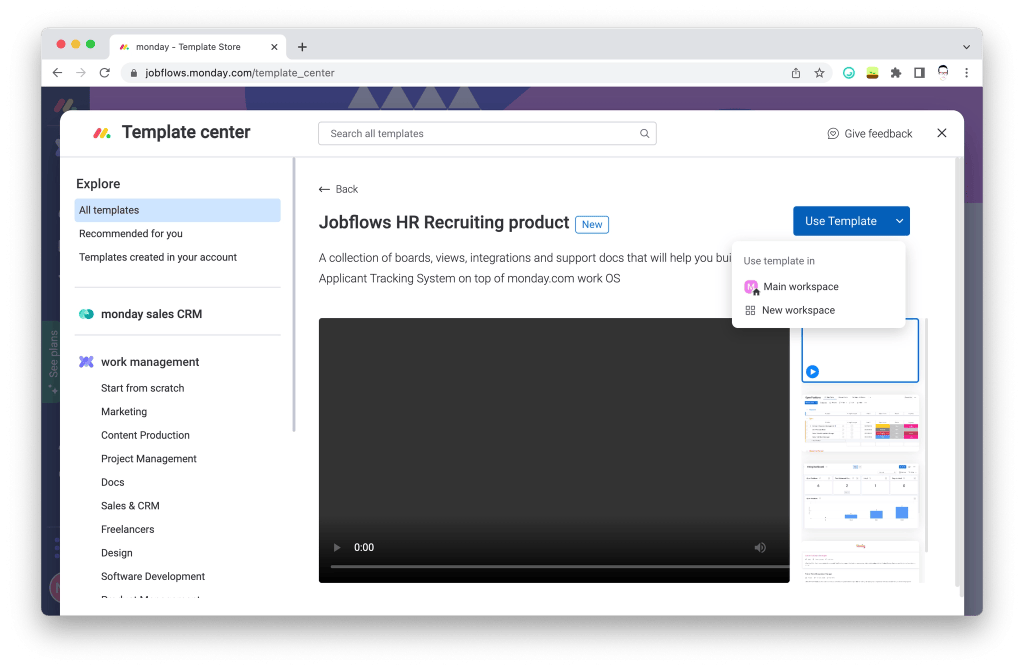
- Click Use Template, then select New Workspace to keep your Jobflows setup separate from existing boards
The template comes pre-configured with two core boards: Open Positions and Applicants — both of which you’ll activate in the steps below.
In the template center search for “Jobflows” and select “Jobflows HR recruiting product”.
Now select “Use Template” and click on a “New workspace”
Step 3: Activate the Jobflows Integration on Your Open Positions Board
Now it’s time to connect Jobflows to your Open Positions board so the app can track and manage job listings automatically.
Go to “Open Positions” board → Integrations → Board Integrations. Search for Jobflows Integrations and activate it.
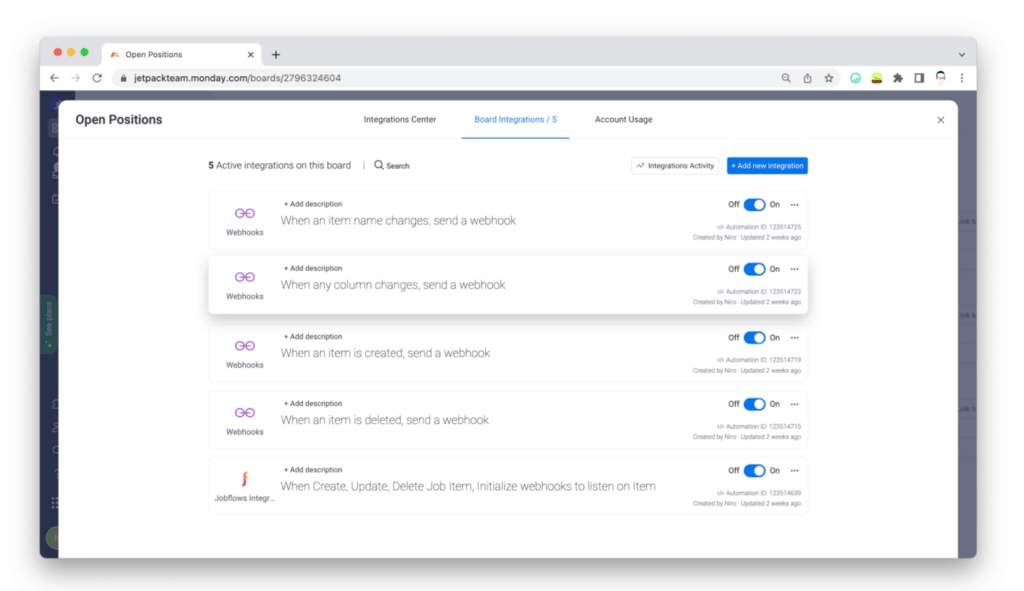
Step 4: Activate Applicant board Integration
Go to “Applicants board” board → Integrations → Board Integrations → Search for Applicant board Integration, and activate it by mapping the board columns listed in the integration recipe.
Step 5: Customize Your Careers Page
With both integrations live, you’re ready to build the public-facing careers page that candidates will see.
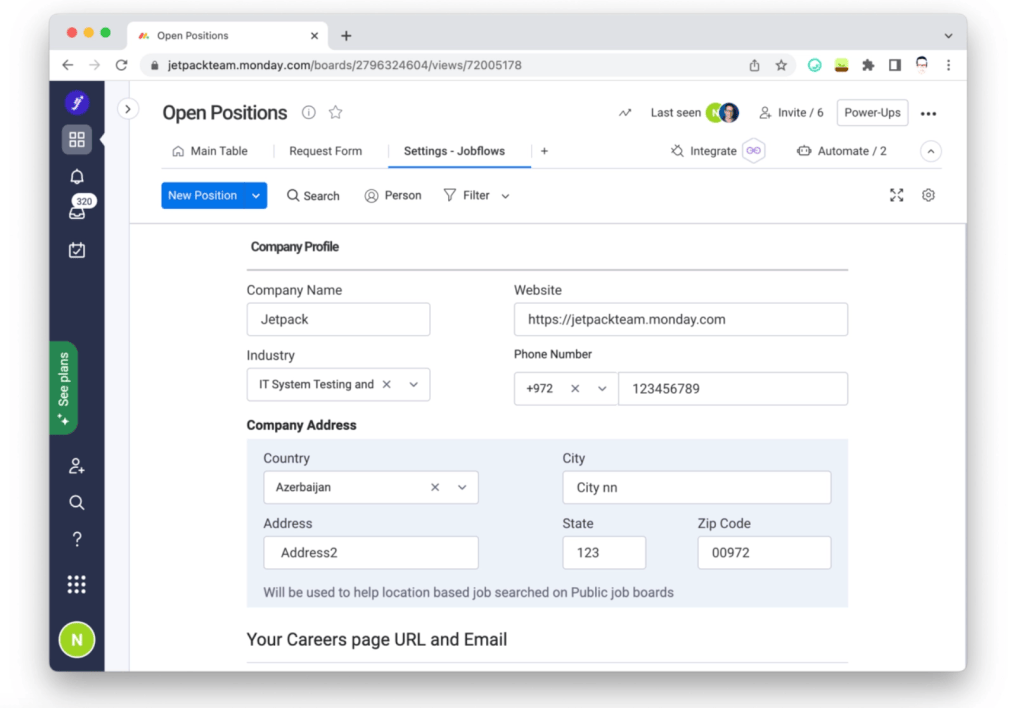
From within the Jobflows app, you can customize:
- Company name and logo — brand the page to match your organization
- Job listing display — choose which open positions are visible to applicants
- Application form fields — collect the information most relevant to your hiring process
- Page URL — set a shareable link you can post on job boards and social media
Once your page looks the way you want, you’re fully set up and ready to start receiving applications.
Step 6: Post Your First Job and Start Receiving Applicants
With your careers page live, it’s time to publish your first job opening.
- In the Open Positions board, add a new item for the role you’re hiring for
- Fill in the job details (title, department, location, description)
- Toggle the position to Published so it appears on your careers page
- Share your careers page URL on LinkedIn, Indeed, your company website, or anywhere you source candidates
Applications submitted through your page will automatically appear in the Applicants board — no manual imports required.
From here, your hiring team can manage candidates, move applicants through pipeline stages, and collaborate — all inside monday.com.
Frequently Asked Questions About Jobflows Setup
Do I need a paid monday.com plan to use Jobflows?
Jobflows works with most monday.com plans, but some integration features may require a Pro or Enterprise account. Check the Jobflows app listing for current plan compatibility details.
What happens if my column mapping is wrong in Step 4?
Applicant data will still be captured, but it may appear in the wrong columns. You can re-open the integration recipe at any time to remap columns without losing existing data.
Can I use Jobflows with an existing monday.com workspace?
Yes. While the Quick Start guide uses a new workspace for a clean setup, you can connect Jobflows integrations to boards in any existing workspace by following Steps 3 and 4.
How do I customize the application form?
Application form fields are managed from within the Jobflows app settings. Navigate to your careers page settings to add, remove, or reorder fields.
Need Help With Your Jobflows Setup?
Still running into issues? The Jobflows team has put together a comprehensive FAQ page covering the most common setup problems.
If you can’t find the answer you need, contact the Jobflows support team directly — they’re responsive and happy to help.